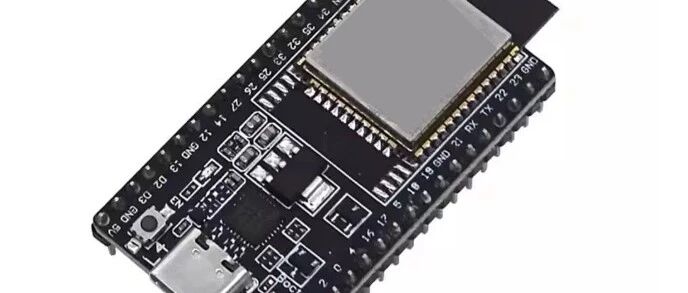
ESP32——蓝牙 BLE_编程教程:Arduino 与 ESP-IDF 双环境指南
蓝牙低功耗(BLE / Bluetooth Low Energy)是 IoT 设备与手机互联的首选协议。ESP32 内置 蓝牙 4.2 + 低功耗蓝牙,支持 BLE 外设(Peripheral)、BLE 中央(Central) 和 Beacon 三种角色。无论是制作智能手表、心率监测器、BLE 网关,还是扫码配网,BLE 都是核心技能。本文从 GATT 原理到实战,覆盖 Arduino 和 ESP-IDF 双环境。
目录
-
BLE 协议基础
-
ESP32 BLE 硬件
-
环境准备与验证
-
BLE 外设模式(被手机连接)
-
BLE 中央模式(连接传感器)
-
BLE Beacon 广播
-
BLE 数据收发实战
-
BLE 通知与订阅
-
BLE + 微信小程序
-
BLE 低功耗优化
-
BLE 安全问题
-
ESP-IDF NimBLE 框架
-
常见问题与调试
-
总结与对比
1. BLE 协议基础
1.1 BLE vs 经典蓝牙
|
特性 |
经典蓝牙 (BR/EDR) |
BLE (低功耗蓝牙) |
|---|---|---|
| 功耗 |
较高 (几十 mA) |
极低
(µA 级) |
| 速率 |
1–3 Mbps |
125 kbps – 2 Mbps |
| 应用场景 |
音频、文件传输 |
传感器、控制、通知 |
| 连接延迟 |
100ms 级 |
可到 ~7.5ms |
| 数据量 |
大 |
小 (20–244 字节/包) |
| 拓扑 |
点对点 |
点对点 / 广播 |
| 协议栈 |
复杂 |
简单 (GATT) |
1.2 BLE 协议栈分层
┌─────────────────────────────────────┐│ 应用层 (APP) ││ GATT / GAP (服务与角色定义) │├─────────────────────────────────────┤│ L2CAP (逻辑链路) ││ 分片、多路复用 │├─────────────────────────────────────┤│ HCI (主机控制接口) │├─────────────────────────────────────┤│ Link Layer (链路层) ││ LL Control、加密、跳频 │├─────────────────────────────────────┤│ Physical Layer (物理层) ││ 2.4GHz GFSK 调制 │└─────────────────────────────────────┘
1.3 角色概念
BLE 有两种角色:广播者/外设 (Peripheral / Advertiser):向外广播数据,等待被连接例: 心率传感器、ESP32 蓝牙服务扫描者/中央 (Central / Scanner):扫描广播,发起连接例: 手机、ESP32 连接传感器⚠️ ESP32 可以同时支持两种角色!Beacon 是特殊的广播者:只广播不连接(如 iBeacon)
1.4 GATT 概念详解
GATT (通用属性协议) 是 BLE 数据交换的核心——用"服务/特征"层级组织数据:
┌─────────────────────────────────┐│ 服务 (Service) ││ ┌───────────────────────────┐ ││ │ 特征 (Characteristic) │ ││ │ ┌─────────────────────┐ │ ││ │ │ 属性 (Value) │ │ ││ │ │ + 属性句柄 (UUID) │ │ ││ │ │ + 属性权限 │ │ ││ │ └─────────────────────┘ │ ││ │ + 特征描述符 (Descriptor) │ ││ └───────────────────────────┘ ││ + 特征 (多个) │└─────────────────────────────────┘一个服务可以包含多个特征一个特征有 16 位或 128 位 UUID 标识
常用 UUID:
|
UUID |
服务/特征 |
说明 |
|---|---|---|
0x1800 |
Generic Access |
通用访问服务 |
0x1801 |
Generic Attribute |
通用属性服务 |
0x180A |
Device Information |
设备信息 |
0x180D |
Heart Rate |
心率服务 |
0x180F |
Battery |
电池服务 |
0x2A00 |
Device Name |
设备名称 |
0x2A19 |
Battery Level |
电池电量 |
0x2A37 |
Heart Rate Measurement |
心率测量 |
| 自定义 |
自定义服务 |
用户 128 位 UUID |
1.5 BLE 通信操作
|
操作 |
方向 |
说明 |
|---|---|---|
| Read |
中央→外设 |
读取特征值 |
| Write |
中央→外设 |
写入特征值 |
| Write No Response |
中央→外设 |
写但不等待确认(更快) |
| Notify |
外设→中央 |
外设主动通知(需要订阅) |
| Indicate |
外设→中央 |
通知并要求确认 |
| Subscribe |
中央→外设 |
订阅通知(CCCD 描述符) |
2. ESP32 BLE 硬件
2.1 BLE 能力
|
参数 |
ESP32 (原版) |
|---|---|
| 蓝牙版本 |
BLE 4.2 (经典蓝牙 + BLE) |
| 角色 |
中央 + 外设 + 广播者 |
| 最多连接 |
3 个并发连接 (BLE) |
| 广播间隔 |
20ms – 10.24s |
| 最大传输单元 (MTU) |
517 字节 |
| 发射功率 |
+12 dBm 到 -6 dBm |
| 接收灵敏度 |
-97 dBm (BLE) |
| 数据速率 |
最高 ~1 Mbps (BLE 4.2) |
| 天线 |
PCB 天线 (2.4GHz) |
⚠️ ESP32 蓝牙 + Wi-Fi 共存
⚠️ 重要:ESP32 蓝牙和 Wi-Fi 共用 2.4GHz 射频!同频段干扰问题:- BLE 和 Wi-Fi 不能同时全速工作- 同一时刻只能有一个使用射频ESP32 的解决方案:- 硬件分时复用(共存机制自动处理)- Wi-Fi 优先于 BLE(默认)- 共存模式下 BLE 性能略有下降实际影响:- 连接 Wi-Fi 时 BLE 广播间隔可能变长- BLE 吞吐量可能降低- 建议错开传输时间(如间隔发送)使用注意:- 如果只要 BLE,不要初始化 Wi-Fi- 如果同时用,接受轻微性能损失
2.2 天线设计(PCB 开发)
ESP32 模块的天线:1. PCB 天线(板载)— 默认使用,注意周围不要有金属2. IPEX 外置天线 — 需要焊接连接器,可外接胶棒天线布局建议:- 天线周围 5mm 内不要走线- 天线不要靠近电池/金属外壳- 远离高频数字信号线
3. 环境准备与验证
3.1 硬件准备
测试 BLE 需要的硬件:✅ ESP32 开发板 × 1✅ 手机 × 1(iOS / Android)✅ 手机 BLE 调试 App:iOS:- LightBlue® (推荐)- nRF Connect- BLE 调试助手Android:- nRF Connect (推荐)- BLE 调试助手- LightBlue
3.2 Arduino 环境
// 安装 BLE 库(两种选择):// 方法 1: 使用 ESP32 官方 BLE 库(推荐)// 文件 → 首选项 → 库管理器// 搜索 "ESP32 BLE Arduino" → 安装// 作者: Neil Kolban// 包含: BLEUtils.h, BLEServer.h, BLEDevice.h ...// 方法 2: ESP32 自带 BLEDevice// #include <BLEDevice.h> // 部分核心版本自带// 验证安装:void setup() {Serial.begin(115200);BLEDevice::init("ESP32_BLE_Test"); // 初始化蓝牙Serial.println("BLE initialized");}void loop() {}
3.3 ESP-IDF 环境
ESP-IDF 提供两套 BLE 栈:# 1. Bluedroid(完整蓝牙栈,功能全面)menuconfig:Component config → Bluetooth → Bluetooth → Enabled→ Bluetooth controller → [Enabled]→ Bluedroid → [Enabled]# 2. NimBLE(轻量级 BLE 栈,推荐用于纯 BLE)menuconfig:Component config → Bluetooth → Bluetooth → Enabled→ Bluetooth controller → [Enabled]→ NimBLE → [Enabled] (同时关闭 Bluedroid)# NimBLE 优势:- 内存占用小 (~50KB vs Bluedroid ~130KB)- 代码更简单- 更活跃的社区维护示例代码位置:examples/bluetooth/bluedroid/ble/gatt_serverexamples/bluetooth/bluedroid/ble/gatt_clientexamples/bluetooth/nimble/bleprph
3.4 验证 BLE 是否工作
/*** 功能: 验证 BLE 广播是否正常* 测试: 用手机 nRF Connect 扫描,应看到设备*/void setup() {Serial.begin(115200);delay(1000);// 初始化 BLEBLEDevice::init("ESP32_BLE_Demo");Serial.println("BLE initialized");// 创建 BLE 服务器BLEServer *server = BLEDevice::createServer();// 创建广播BLEAdvertising *advertising = BLEDevice::getAdvertising();advertising->addServiceUUID(BLEUUID((uint16_t)0x1800));advertising->setScanResponse(true);advertising->setMinPreferred(0x06); // iPhone 连接优化advertising->setMinPreferred(0x12);// 启动广播BLEDevice::startAdvertising();Serial.println("Advertising started!");Serial.println("Use nRF Connect app to scan for 'ESP32_BLE_Demo'");}void loop() {delay(1000);}
4. BLE 外设模式(被手机连接)
4.1 基本外设(GATT 服务器)
/*** 功能: BLE 外设 — 创建 GATT 服务供手机连接* 测试: 手机 nRF Connect 连接后,可以看到服务和特征*/// 自定义服务/特征 UUID// 连接回调class MyServerCallbacks : public BLEServerCallbacks {void onConnect(BLEServer *server) {Serial.println("📱 Client connected!");digitalWrite(2, HIGH);}void onDisconnect(BLEServer *server) {Serial.println("📵 Client disconnected");digitalWrite(2, LOW);// 重新开始广播(断开后需要重新广播)BLEDevice::startAdvertising();}};void setup() {Serial.begin(115200);pinMode(2, OUTPUT);// 1. 初始化 BLEBLEDevice::init("ESP32_Server");Serial.println("BLE Server initializing...");// 2. 创建服务器BLEServer *server = BLEDevice::createServer();server->setCallbacks(new MyServerCallbacks());// 3. 创建服务BLEService *service = server->createService(SERVICE_UUID);// 4. 创建特征(可读可写)BLECharacteristic *characteristic = service->createCharacteristic(CHARACTERISTIC_UUID,BLECharacteristic::PROPERTY_READ | // 可读BLECharacteristic::PROPERTY_WRITE | // 可写BLECharacteristic::PROPERTY_NOTIFY // 可通知);// 5. 添加 CCCD 描述符(Notify 必需)characteristic->addDescriptor(new BLE2902());// 6. 设置初始值characteristic->setValue("Hello from ESP32!");// 7. 启动服务service->start();// 8. 开始广播BLEAdvertising *advertising = BLEDevice::getAdvertising();advertising->addServiceUUID(SERVICE_UUID);advertising->setScanResponse(true);advertising->setMinPreferred(0x06);BLEDevice::startAdvertising();Serial.println("✅ BLE Server ready");Serial.println("Service UUID: " + String(SERVICE_UUID));}void loop() {delay(1000);}
4.2 特征值读写回调
/*** 功能: 处理手机写入的数据* 场景: 手机发送命令控制 ESP32*/// ── 特征值回调:处理手机写入 ──class MyCharacteristicCallbacks : public BLECharacteristicCallbacks {void onWrite(BLECharacteristic *characteristic) {std::string value = characteristic->getValue();Serial.printf("📥 Received %d bytes: ", value.length());for (size_t i = 0; i < value.length(); i++) {Serial.printf("0x%02X ", (uint8_t)value[i]);}Serial.println();// 根据接收内容执行操作if (value == "ON") {digitalWrite(2, HIGH);characteristic->setValue("LED ON");Serial.println("LED turned ON");} else if (value == "OFF") {digitalWrite(2, LOW);characteristic->setValue("LED OFF");Serial.println("LED turned OFF");} else {characteristic->setValue("Unknown command");}}// 手机读取时的回调(可选)void onRead(BLECharacteristic *characteristic) {Serial.println("📖 Characteristic read by phone");}};// ── 连接回调 ──class MyServerCallbacks : public BLEServerCallbacks {void onConnect(BLEServer *server) {Serial.println("📱 Connected");}void onDisconnect(BLEServer *server) {Serial.println("📵 Disconnected");BLEDevice::startAdvertising(); // 重新广播}};void setup() {Serial.begin(115200);pinMode(2, OUTPUT);BLEDevice::init("ESP32_LED");BLEServer *server = BLEDevice::createServer();server->setCallbacks(new MyServerCallbacks());BLEService *service = server->createService(SERVICE_UUID);BLECharacteristic *characteristic = service->createCharacteristic(CHARACTERISTIC_UUID,BLECharacteristic::PROPERTY_READ |BLECharacteristic::PROPERTY_WRITE |BLECharacteristic::PROPERTY_NOTIFY);characteristic->setCallbacks(new MyCharacteristicCallbacks());characteristic->addDescriptor(new BLE2902());characteristic->setValue("READY");service->start();BLEAdvertising *advertising = BLEDevice::getAdvertising();advertising->addServiceUUID(SERVICE_UUID);BLEDevice::startAdvertising();Serial.println("✅ BLE LED Control ready");Serial.println("Phone app: write 'ON' or 'OFF'");}void loop() {delay(1000);}
4.3 多服务多特征
/*** 功能: 创建多个服务(常见于专业 BLE 设备)* 场景: 传感器设备 — 电池服务 + 传感器服务 + 设备信息服务*/// 服务 UUID// 特征 UUIDBLEService *battery_service;BLECharacteristic *battery_char;BLECharacteristic *temp_char;BLECharacteristic *humid_char;void setup() {Serial.begin(115200);BLEDevice::init("ESP32_MultiService");BLEServer *server = BLEDevice::createServer();// ── 服务 1: 电池 ──battery_service = server->createService(SERVICE_BATTERY);battery_char = battery_service->createCharacteristic(CHAR_BATTERY_LEVEL,BLECharacteristic::PROPERTY_READ | BLECharacteristic::PROPERTY_NOTIFY);battery_char->addDescriptor(new BLE2902());battery_char->setValue((uint8_t)85); // 85% 电量// ── 服务 2: 环境传感 ──BLEService *sensor_service = server->createService(SERVICE_SENSOR);temp_char = sensor_service->createCharacteristic(CHAR_TEMP,BLECharacteristic::PROPERTY_READ | BLECharacteristic::PROPERTY_NOTIFY);temp_char->addDescriptor(new BLE2902());humid_char = sensor_service->createCharacteristic(CHAR_HUMIDITY,BLECharacteristic::PROPERTY_READ | BLECharacteristic::PROPERTY_NOTIFY);humid_char->addDescriptor(new BLE2902());// ── 启动所有服务 ──battery_service->start();sensor_service->start();// 广播所有服务BLEAdvertising *advertising = BLEDevice::getAdvertising();advertising->addServiceUUID(SERVICE_BATTERY);advertising->addServiceUUID(SERVICE_SENSOR);BLEDevice::startAdvertising();Serial.println("✅ Multi-service BLE ready");}void loop() {// 每 5 秒更新数据static unsigned long last = 0;if (millis() - last > 5000) {last = millis();// 模拟传感器读数float temp = 25.0 + (esp_random() % 100) / 100.0;float hum = 60.0 + (esp_random() % 100) / 100.0;// 更新特征值char buf[16];snprintf(buf, sizeof(buf), "%.1f", temp);temp_char->setValue(buf);snprintf(buf, sizeof(buf), "%.1f", hum);humid_char->setValue(buf);// 通知已订阅的手机temp_char->notify();humid_char->notify();Serial.printf("Updated: temp=%.1f hum=%.1f\n", temp, hum);}delay(100);}
5. BLE 中央模式(连接传感器)
5.1 扫描设备
/*** 功能: BLE 中央 — 扫描附近的 BLE 设备* 场景: ESP32 作为网关,扫描并连接传感器*/int scanTime = 5; // 扫描时长(秒)// ── 扫描结果处理 ──class MyAdvertisedDeviceCallbacks : public BLEAdvertisedDeviceCallbacks {void onResult(BLEAdvertisedDevice advertisedDevice) {Serial.printf("📡 Device: %s | ",advertisedDevice.toString().c_str());// 打印 RSSI(信号强度)Serial.printf("RSSI: %d dBm | ", advertisedDevice.getRSSI());// 有名称则打印if (advertisedDevice.haveName()) {Serial.printf("Name: %s | ", advertisedDevice.getName().c_str());}Serial.println();}};void setup() {Serial.begin(115200);Serial.println("BLE Scanner");// 初始化 BLEBLEDevice::init("");// 创建扫描器BLEScan *scan = BLEDevice::getScan();scan->setAdvertisedDeviceCallbacks(new MyAdvertisedDeviceCallbacks());scan->setActiveScan(true); // 主动扫描(响应更快)scan->setInterval(100); // 扫描间隔 (ms)scan->setWindow(99); // 扫描窗口 (ms)// 执行扫描(阻塞)Serial.printf("Scanning for %d seconds...\n", scanTime);BLEScanResults results = scan->start(scanTime);Serial.printf("\n✅ Found %d devices\n", results.getCount());for (int i = 0; i < results.getCount(); i++) {BLEAdvertisedDevice device = results.getDevice(i);Serial.printf(" %d. %s | RSSI: %d\n",i + 1,device.toString().c_str(),device.getRSSI());}}void loop() {delay(10000); // 10 秒后重新扫描}
5.2 连接并从特征读取数据
/*** 功能: 连接 BLE 设备并读取特征值* 场景: ESP32 连接心率传感器并读取心率*/// 目标设备信息BLEUUID serviceUUID(TARGET_SERVICE_UUID);BLEUUID charUUID(TARGET_CHAR_UUID);// 连接回调static BLEAddress *pServerAddress = NULL;// ── 连接并读取数据 ──bool connectToServer(BLEAddress pAddress) {Serial.printf("Connecting to %s...\n", pAddress.toString().c_str());BLEClient *client = BLEDevice::createClient();client->connect(pAddress);Serial.println("✅ Connected");// 获取服务BLERemoteService *remoteService =client->getService(serviceUUID);if (remoteService == nullptr) {Serial.println("❌ Service not found!");return false;}Serial.println("Service found");// 获取特征BLERemoteCharacteristic *remoteCharacteristic =remoteService->getCharacteristic(charUUID);if (remoteCharacteristic == nullptr) {Serial.println("❌ Characteristic not found!");return false;}Serial.println("Characteristic found");// 读取特征值std::string value = remoteCharacteristic->readValue();Serial.printf("📖 Read value: %s\n", value.c_str());return true;}void setup() {Serial.begin(115200);BLEDevice::init("");// 扫描目标设备BLEScan *scan = BLEDevice::getScan();scan->setActiveScan(true);Serial.printf("Scanning for %s...\n", TARGET_NAME);BLEScanResults results = scan->start(10);bool found = false;for (int i = 0; i < results.getCount(); i++) {BLEAdvertisedDevice device = results.getDevice(i);if (device.haveName() && device.getName() == TARGET_NAME) {Serial.printf("🎯 Found target: %s\n", device.toString().c_str());found = true;// 保存地址并连接pServerAddress = new BLEAddress(device.getAddress());connectToServer(*pServerAddress);break;}}if (!found) {Serial.println("❌ Target device not found");}}void loop() {delay(10000);}
5.3 客户端回调(接收通知)
/*** 功能: 订阅 BLE 特征通知(客户端)* 场景: 接收外设主动推送的数据*/BLEUUID serviceUUID(SERVICE_UUID);BLEUUID charUUID(CHAR_UUID);static boolean doConnect = false;static boolean connected = false;static BLEAddress *serverAddress;// ── 通知回调:外设推送数据时触发 ──class MyClientCallback : public BLEClientCallbacks {void onConnect(BLEClient *client) {connected = true;Serial.println("✅ Connected to server");}void onDisconnect(BLEClient *client) {connected = false;Serial.println("📵 Disconnected");// 重新扫描连接doConnect = true;}};// ── 特征通知回调 ──class MyNotifyCallback : public BLECharacteristicCallbacks {void onNotify(BLEClient *client, BLERemoteCharacteristic *characteristic,uint8_t *data, size_t len) {Serial.printf("🔔 Notification (%d bytes): ", len);for (size_t i = 0; i < len; i++) {Serial.printf("0x%02X ", data[i]);}Serial.println();}};// ── 连接并订阅 ──bool connectAndSubscribe(BLEAddress address) {BLEClient *client = BLEDevice::createClient();client->setClientCallbacks(new MyClientCallback());client->connect(address);BLERemoteService *service = client->getService(serviceUUID);BLERemoteCharacteristic *characteristic =service->getCharacteristic(charUUID);// 注册通知回调characteristic->registerForNotify([](BLERemoteCharacteristic *c, uint8_t *data, size_t len, bool isNotify) {Serial.printf("🔔 Got %d bytes: ", len);for (int i = 0; i < len; i++) {Serial.printf("%02X ", data[i]);}Serial.println();}, true);return true;}void setup() {Serial.begin(115200);BLEDevice::init("");BLEDevice::setClientCallbacks(new MyClientCallback());// 扫描并连接BLEScan *scan = BLEDevice::getScan();scan->setActiveScan(true);BLEScanResults results = scan->start(5);for (int i = 0; i < results.getCount(); i++) {BLEAdvertisedDevice device = results.getDevice(i);if (device.haveServiceUUID() && device.isAdvertisingService(serviceUUID)) {serverAddress = new BLEAddress(device.getAddress());doConnect = true;break;}}}void loop() {if (doConnect) {doConnect = false;if (connectAndSubscribe(*serverAddress)) {Serial.println("Subscribed to notifications");}}delay(100);}
6. BLE Beacon 广播
6.1 Beacon 概念
Beacon 是一种特殊的 BLE 广播方式:特点:- 只广播,不连接- 周期性发送一小段数据- 低功耗(广播间隔可配置)常见协议:- iBeacon (苹果)- Eddystone (谷歌)- 自定义广播应用:- 室内定位- 广告推送- 近场触发(到店检测)- 资产追踪
6.2 iBeacon 实现
/*** 功能: 制作 iBeacon 广播* 测试: 用手机 nRF Connect 或 Locate Beacon 查看** iBeacon 广播数据格式:* 02 01 06 — Flags* 1A FF — Manufacturer Specific Data* 4C 00 — Apple Company ID* 02 15 — iBeacon Type* <UUID 16字节>* <Major 2字节> <Minor 2字节>* <Tx Power 1字节>*/// iBeacon 参数const char *BEACON_UUID = "74278BDA-B644-4520-8F0C-720EAF059935";uint16_t major = 100;uint16_t minor = 1;int8_t txPower = -59; // 1m 处的信号强度 (dBm)// 构建 iBeacon 广播数据BLEAdvertisementData buildIBeaconData() {BLEAdvertisementData advData;// 自定义广播数据std::string data;// Flagsdata += (char)0x02; // 长度data += (char)0x01; // 类型data += (char)0x06; // LE General Discoverable + BR/EDR Not Supported// iBeacon 厂商数据data += (char)0x1A; // 长度 (26)data += (char)0xFF; // Manufacturer Specificdata += (char)0x4C; // Appledata += (char)0x00;data += (char)0x02; // iBeacondata += (char)0x15;// UUID (16 字节)std::string uuidStr = BEACON_UUID;uuidStr.erase(std::remove(uuidStr.begin(), uuidStr.end(), '-'), uuidStr.end());for (int i = 0; i < 32; i += 2) {std::string byteStr = uuidStr.substr(i, 2);data += (char)strtol(byteStr.c_str(), NULL, 16);}// Major (2 字节, 大端)data += (char)(major >> 8);data += (char)(major & 0xFF);// Minor (2 字节, 大端)data += (char)(minor >> 8);data += (char)(minor & 0xFF);// Tx Powerdata += (char)txPower;advData.setData(data);return advData;}void setup() {Serial.begin(115200);BLEDevice::init("");// 创建广播BLEAdvertising *advertising = BLEDevice::getAdvertising();// 设置 iBeacon 数据advertising->setAdvertisementData(buildIBeaconData());// 广播参数advertising->setScanResponse(false);advertising->setMinInterval(100); // 100msadvertising->setMaxInterval(200); // 200ms// 开始广播advertising->start();Serial.println("✅ iBeacon started");Serial.printf("UUID: %s\n", BEACON_UUID);Serial.printf("Major: %d, Minor: %d\n", major, minor);}void loop() {delay(1000);}
6.3 自定义 Beacon(传感器数据广播)
/*** 功能: 自定义 Beacon — 广播传感器数据* 场景: 不需要连接,让手机直接接收传感器读数*/void setup() {Serial.begin(115200);BLEDevice::init("");}void updateBeaconData() {BLEAdvertising *advertising = BLEDevice::getAdvertising();// 读取传感器float temp = 25.3;float humid = 60.5;// 构建自定义广播数据BLEAdvertisementData data;std::string customData;customData += (char)0x03; // 长度customData += (char)0xFF; // 厂商数据customData += (char)0x01; // 厂商 ID (自定义)customData += (char)0x02; // 数据版本// 温度 (2 字节,整数*10)int temp_i = (int)(temp * 10);customData += (char)(temp_i >> 8);customData += (char)(temp_i & 0xFF);// 湿度 (2 字节,整数*10)int hum_i = (int)(humid * 10);customData += (char)(hum_i >> 8);customData += (char)(hum_i & 0xFF);data.setData(customData);advertising->setAdvertisementData(data);}void loop() {updateBeaconData();// 重新广播BLEAdvertising *advertising = BLEDevice::getAdvertising();advertising->stop();advertising->start();delay(1000); // 每秒更新一次}
7. BLE 数据收发实战
7.1 发送大数据(分包)
/*** 功能: 通过 BLE 发送大数据(如日志、配置)* 原理: BLE 单包最大 20 字节(默认),需要分包发送* 建议通过多特征或分片协议实现*/BLECharacteristic *data_char;// ── 分包发送大数据 ──void sendDataInChunks(BLECharacteristic *characteristic,uint8_t *data, size_t len) {const size_t CHUNK_SIZE = 20; // BLE 单包最大 20 字节size_t offset = 0;uint32_t seq = 0;while (offset < len) {size_t chunkLen = min(CHUNK_SIZE - 2, len - offset); // 2 字节帧头// 构建分片帧: [序号高] [序号低] [数据...]uint8_t packet[22];packet[0] = (seq >> 8) & 0xFF;packet[1] = seq & 0xFF;memcpy(packet + 2, data + offset, chunkLen);characteristic->setValue(packet, chunkLen + 2);characteristic->notify();offset += chunkLen;seq++;delay(10); // 给手机处理时间}// 发送结束标志uint8_t end[] = {0xFF, 0xFF};characteristic->setValue(end, 2);characteristic->notify();Serial.printf("Sent %d bytes in %u chunks\n", len, seq);}// 测试数据void sendTestData() {// 发送 500 字节的随机数据uint8_t testData[500];for (int i = 0; i < 500; i++) {testData[i] = i % 256;}sendDataInChunks(data_char, testData, sizeof(testData));}void setup() {Serial.begin(115200);BLEDevice::init("ESP32_DataSender");BLEServer *server = BLEDevice::createServer();BLEService *service = server->createService(SERVICE_UUID);data_char = service->createCharacteristic(CHAR_DATA_UUID,BLECharacteristic::PROPERTY_NOTIFY | BLECharacteristic::PROPERTY_READ);data_char->addDescriptor(new BLE2902());data_char->setValue("ready");service->start();BLEDevice::startAdvertising();Serial.println("Ready. Connect and send data.");}void loop() {// 每 5 秒发送一次测试数据static unsigned long last = 0;if (millis() - last > 5000) {last = millis();sendTestData();}delay(10);}
7.2 提高吞吐量
/*** 功能: 优化 BLE 吞吐量*/// ════════════════════════════════════════════════// BLE 吞吐量优化技巧://// 1. 增大 MTU(传输单元)// 默认 23 字节(含 3 字节开销)→ 请求 517 字节// iOS: 请求 185 字节 (iPhone 支持)// Android: 请求 517 字节//// 2. 使用 Write Without Response (更快)// 比 Write with Response 快 ~2×//// 3. 增大连接间隔// 连接间隔越短,延迟越低,但功耗更高//// 4. 使用多个并行特征// 可以在多个特征间交替发送// ════════════════════════════════════════════════// ── 请求更大 MTU(客户端)──class MyClientCallback : public BLEClientCallbacks {void onConnect(BLEClient *client) {// 请求更大的 MTU (185 字节)// 注意: 部分 BLE 核心版本需要在连接后请求Serial.println("Connected. Requesting MTU 185...");}};// 或使用以下方法:void requestLargerMTU(BLEClient *client) {// ESP32 Arduino 核心自动请求 MTU 517// 也可以通过配置设置:// BLEDevice::setMTU(185);}
7.3 BLE 传输速率实测
ESP32 BLE 实际传输速率参考:配置 速率────────────────── ──────Notify, 20字节, 默认 ~1 KB/sNotify, 20字节, 优化 ~3 KB/sNotify, 185字节 MTU ~10 KB/sNotify, 512字节 MTU ~20 KB/s高速模式 (1M PHY) 最高 ~40 KB/s影响速率因素:- MTU 大小 (最关键)- 连接间隔- 是否使用 Write No Response- 手机系统的 BLE 性能限制
8. BLE 通知与订阅
8.1 外设主动通知
/*** 功能: 外设向已订阅的手机推送数据* 场景: 传感器周期性上报(无需手机轮询)*/BLECharacteristic *notify_char;// ── 订阅状态跟踪 ──class MyCharCallbacks : public BLECharacteristicCallbacks {// 手机订阅/取消订阅时触发(通过 CCCD)void onSubscribe(BLECharacteristic *characteristic,BLE2902 *descriptor) {uint16_t cccd = descriptor->getValue();if (cccd & 0x0001) { // Notifications 使能Serial.println("🔔 Phone subscribed to notifications");} else {Serial.println("🔕 Phone unsubscribed");}}};void setup() {Serial.begin(115200);BLEDevice::init("ESP32_Notifier");BLEServer *server = BLEDevice::createServer();BLEService *service = server->createService(SERVICE_UUID);notify_char = service->createCharacteristic(CHAR_NOTIFY_UUID,BLECharacteristic::PROPERTY_NOTIFY | // 通知BLECharacteristic::PROPERTY_READ);notify_char->addDescriptor(new BLE2902()); // CCCD 必须!notify_char->setCallbacks(new MyCharCallbacks());service->start();BLEDevice::startAdvertising();Serial.println("✅ Notification service ready");Serial.println("Connect phone app and tap subscribe (CCCD)");}void loop() {// 每 2 秒通知一次(即使没人订阅也无妨)static unsigned long last = 0;if (millis() - last > 2000) {last = millis();// 生成心跳数据uint16_t heart_rate = 60 + esp_random() % 40; // 60-100uint8_t data[2] = {0, (uint8_t)heart_rate};// 通知已订阅客户端notify_char->setValue(data, 2);notify_char->notify();Serial.printf("💓 Notified: HR=%d bpm\n", heart_rate);}delay(10);}
8.2 Notify vs Indicate
/** Notify vs Indicate 区别:** Notify (通知):* - 不要求接收方确认* - 更快的传输速率* - 可能丢失数据(极少)* - 用 PROPERTY_NOTIFY 声明* - CCCD 值 0x0001** Indicate (指示):* - 接收方必须确认 (ACK)* - 确保数据送达* - 速度略慢* - 用 PROPERTY_INDICATE 声明* - CCCD 值 0x0002** 选择建议:* - 周期上报 → Notify* - 关键指令 → Indicate* - 大数据量 → Notify*/// 创建一个同时支持 Notify 和 Indicate 的特征BLECharacteristic *char_data = service->createCharacteristic(CHAR_UUID,BLECharacteristic::PROPERTY_NOTIFY |BLECharacteristic::PROPERTY_INDICATE |BLECharacteristic::PROPERTY_READ);// 使用 Notify 发送char_data->notify();// 使用 Indicate 发送char_data->indicate(); // 等待手机 ACK
9. BLE + 微信小程序
9.1 小程序 BLE API
微信小程序通过 wx.openBluetoothAdapter / wx.createBLEConnection 系列 API 连接 BLE 设备。
// ════════════════════════════════════════════════// 微信小程序 BLE 连接 ESP32 示例// ════════════════════════════════════════════════// 1. 初始化蓝牙wx.openBluetoothAdapter({success: function(res) {console.log('蓝牙适配器打开成功');startScan();},fail: function(err) {console.log('打开蓝牙失败', err);}});// 2. 开始扫描function startScan() {wx.startBluetoothDevicesDiscovery({allowDuplicatesKey: true,interval: 100,success: function(res) {console.log('开始扫描');setTimeout(stopScan, 5000);}});}// 3. 监听发现设备wx.onBluetoothDeviceFound(function(res) {var devices = res.devices;for (var i = 0; i < devices.length; i++) {var device = devices[i];// 查找 ESP32 设备(根据广播数据或名称)if (device.name && device.name.indexOf('ESP32') >= 0) {console.log('找到 ESP32 设备', device);connectDevice(device.deviceId);break;}}});// 4. 连接设备function connectDevice(deviceId) {wx.createBLEConnection({deviceId: deviceId,success: function(res) {console.log('连接成功');getServices(deviceId);},fail: function(err) {console.log('连接失败', err);}});}// 5. 获取服务var SERVICE_UUID = '4fafc201-1fb5-459e-8fcc-c5c9c331914b';var CHAR_UUID = 'beb5483e-36e1-4688-b7f5-ea07361b26a8';var deviceIdGlobal = '';function getServices(deviceId) {deviceIdGlobal = deviceId;wx.getBLEDeviceServices({deviceId: deviceId,success: function(res) {console.log('服务列表:', res.services);enableNotify();}});}// 6. 获取特征值function getCharacteristics() {wx.getBLEDeviceCharacteristics({deviceId: deviceIdGlobal,serviceId: SERVICE_UUID,success: function(res) {console.log('特征列表:', res.characteristics);}});}// 7. 启用通知(接收 ESP32 推送)function enableNotify() {wx.notifyBLECharacteristicValueChange({deviceId: deviceIdGlobal,serviceId: SERVICE_UUID,characteristicId: CHAR_UUID,state: true,success: function(res) {console.log('已启用通知');listenForData();}});}// 8. 监听通知数据function listenForData() {wx.onBLECharacteristicValueChange(function(res) {// res.value 是 ArrayBuffervar data = new Uint8Array(res.value);console.log('收到数据:', data);});}// 9. 发送数据到 ESP32function sendToESP32(message) {// 字符串转 ArrayBuffervar buffer = new ArrayBuffer(message.length);var dataView = new DataView(buffer);for (var i = 0; i < message.length; i++) {dataView.setUint8(i, message.charCodeAt(i));}wx.writeBLECharacteristicValue({deviceId: deviceIdGlobal,serviceId: SERVICE_UUID,characteristicId: CHAR_UUID,value: buffer,success: function(res) {console.log('发送成功');},fail: function(err) {console.log('发送失败', err);}});}// 10. 断开连接function disconnect() {wx.closeBLEConnection({deviceId: deviceIdGlobal,success: function() {console.log('已断开');}});}
9.2 蓝牙调试工具对比
|
工具 |
平台 |
特点 |
|---|---|---|
| nRF Connect |
iOS/Android |
⭐ 功能最全,专业 |
| LightBlue |
iOS |
简洁易用 |
| BLE 调试助手 |
Android |
国产,常用 |
| 微信小程序调试 |
微信 |
实际项目调试 |
| esp32 Ble Mesh |
Android |
Espressif 官方 |
10. BLE 低功耗优化
10.1 广播功耗
BLE 广播功耗优化:广播参数 功耗 (mA)────────────────────── ────────广播间隔 20ms ~15 mA广播间隔 100ms ~5 mA广播间隔 1s ~1 mA广播间隔 10s ~0.3 mA广播间隔设置:advertising->setMinInterval(1000); // 最小间隔 (0.625ms 单位)advertising->setMaxInterval(2000); // 最大间隔注意: 广播间隔越长,手机发现设备越慢建议 ≤ 100ms 用于快速配对
10.2 连接功耗
连接期间的功耗优化:关键参数:- 连接间隔 (Connection Interval)- 从机延迟 (Slave Latency)- 超时时间 (Supervision Timeout)默认值:- 连接间隔: 30ms- 从机延迟: 0 (每个间隔都唤醒)- 超时: 5s优化设置 (ESP-IDF):esp_ble_gap_update_conn_params(...)// conn_interval_min = 100 (100 × 1.25ms = 125ms)// conn_interval_max = 200// slave_latency = 4 (每 5 个间隔醒来一次)// supervision_timeout = 500 (5s)
10.3 深度睡眠 + BLE 唤醒
/*** 功能: 深度睡眠 + BLE 定时唤醒(低功耗 IoT 节点)* 注意: BLE 不能从深度睡眠唤醒(这是 Wi-Fi 才有的功能)* 但可以定时唤醒后短暂广播*/RTC_DATA_ATTR int boot_count = 0;void setup() {Serial.begin(115200);delay(100);boot_count++;Serial.printf("Boot #%d\n", boot_count);// ── 1. 初始化 BLE 并广播 3 秒 ──BLEDevice::init("ESP32_Beacon");BLEDevice::getAdvertising()->start();Serial.println("Broadcasting for 3 seconds...");// 广播 3 秒让手机有机会扫描到delay(3000);BLEDevice::deinit(false); // 关闭 BLE// ── 2. 深度睡眠 30 秒 ──Serial.println("Entering deep sleep for 30s...");Serial.flush();esp_sleep_enable_timer_wakeup(30 * 1000000ULL);esp_deep_sleep_start();}void loop() {}
10.4 BLE 低功耗技巧汇总
🔋 BLE 低功耗优化清单:1. ⭐ 广播间隔适当拉长需要快速连接 → 100ms省电优先 → 1s+2. ⭐ 不连接时关闭 BLE只在需要时才初始化广播3. 使用从机延迟 (Slave Latency)允许跳过多个连接间隔再唤醒4. 缩短连接时间数据传完就断开,不要保持长连接5. 减少数据量能用 1 字节绝不用 4 字节传感器数据压缩6. 降低发射功率esp_ble_tx_power_set(ESP_BLE_PWR_LVL_P3);// P0=-12dBm(最省电) P3=0dBm(默认) P9=+12dBm(最强)7. 使用深度睡眠周期广播每 30s 唤醒广播 1s → 平均功耗极低8. 广播时设置 TX 功率近距离设备用低功率即可
11. BLE 安全问题
11.1 认证与加密
/*** 功能: BLE 配对认证(PIN 码)* 场景: 防止未授权设备连接*/// ── 安全回调 ──class MySecurityCallbacks : public BLESecurityCallbacks {uint32_t onPassKeyRequest() {Serial.println("📋 Passkey requested");return 123456; // 固定 PIN 码}void onPassKeyNotify(uint32_t pass_key) {Serial.printf("🔑 Passkey: %u\n", pass_key);}bool onConfirmPIN(uint32_t pass_key) {Serial.printf("🔑 Confirm PIN: %u\n", pass_key);return true; // 自动确认}bool onSecurityRequest() {Serial.println("🔒 Security requested");return true;}void onAuthenticationComplete(esp_ble_auth_cmpl_t auth_cmpl) {if (auth_cmpl.success) {Serial.println("🔓 Authentication success!");} else {Serial.println("🔒 Authentication failed!");}}};void setup() {Serial.begin(115200);BLEDevice::init("ESP32_Secure");// ── 启用安全功能 ──BLESecurity *security = new BLESecurity();security->setAuthenticationMode(ESP_LE_AUTH_REQ_SC_BOND);security->setCapability(ESP_IO_CAP_OUT); // 有输出(显示 PIN)security->setPin(123456);security->setSecurityCallbacks(new MySecurityCallbacks());BLEServer *server = BLEDevice::createServer();// ... 创建服务和特征 ...Serial.println("✅ Secure BLE ready (PIN: 123456)");}void loop() {delay(1000);}
11.2 安全建议
🔐 BLE 安全建议:1. ⭐ 始终启用配对认证默认情况下 BLE 可被任何人连接!2. 使用加密连接传输敏感数据时强制加密3. PIN 码不要用固定值(生产环境)开发阶段可以用固定 PIN生产建议动态生成 + 屏幕显示4. 校验数据完整性命令帧加 CRC 或校验和防止中间人篡改5. BLE 广播数据不包含敏感信息广播是公开的,任何人可嗅探!6. 限制连接数量每个 ESP32 默认允许 3 个连接生产环境可限制为 17. 定期更新固件BLE 漏洞主要通过 OTA 修复
12. ESP-IDF NimBLE 框架
12.1 NimBLE 简介
NimBLE (Apache 2.0) 是轻量级 BLE 协议栈:优势:- 内存占用小 (~50KB,Bluedroid 需 ~130KB)- 代码简单易读- 活跃社区- 纯 BLE 场景推荐配置 (menuconfig):Component config → Bluetooth → Bluetooth → Enabled→ Bluetooth controller → Enabled→ NimBLE → Enabled (关闭 Bluedroid)示例:examples/bluetooth/nimble/bleprph (外设)examples/bluetooth/nimble/blecent (中央)examples/bluetooth/nimble/blemesh (Mesh)
12.2 NimBLE 外设示例
/*** 功能: NimBLE GATT 服务器(外设)*/static const char *TAG = "NimBLE";// ── GATT 服务/特征定义 ──static const ble_uuid128_t gatt_svr_svc_uuid = BLE_UUID128_INIT(0x14, 0x9f, 0xc2, 0x01, 0xb5, 0x1f, 0x59, 0x4e,0x8f, 0xcc, 0xc5, 0xc9, 0x33, 0x19, 0x4f, 0xaf);static const ble_uuid128_t gatt_svr_chr_uuid = BLE_UUID128_INIT(0xa8, 0x26, 0x61, 0xea, 0x07, 0xf5, 0x88, 0x46,0xb7, 0xf5, 0xe1, 0x36, 0x3e, 0x54, 0xb5, 0xbe);// ── 特征写入回调 ──static int gatt_svr_chr_write(struct ble_hs_conn *conn,uint16_t attr_handle,struct os_mbuf *om, uint16_t min_len,uint16_t max_len, void *arg) {uint8_t data[256];uint16_t len = OS_MBUF_PKTLEN(om);if (len > sizeof(data)) {return BLE_ATT_ERR_INVALID_ATTR_VALUE_LEN;}os_mbuf_copydata(om, 0, len, data);data[len] = '\0';ESP_LOGI(TAG, "Received (%d): %s", len, data);return 0;}// ── GATT 服务定义 ──static const struct ble_gatt_svc_def gatt_svr_svcs[] = {// 自定义服务{.type = BLE_GATT_SVC_TYPE_PRIMARY,.uuid = &gatt_svr_svc_uuid.u,.characteristics = (struct ble_gatt_chr_def[]) {{.uuid = &gatt_svr_chr_uuid.u,.access_cb = gatt_svr_chr_write,.flags = BLE_GATT_CHR_F_READ |BLE_GATT_CHR_F_WRITE |BLE_GATT_CHR_F_NOTIFY,},},},{.type = BLE_GATT_SVC_TYPE_END, // 结束标记},};// ── GAP 事件处理 ──static int gap_event_handler(struct ble_gap_event *event, void *arg) {switch (event->type) {case BLE_GAP_EVENT_CONNECT:ESP_LOGI(TAG, "Connection %s",event->connect.status == 0 ? "established" : "failed");break;case BLE_GAP_EVENT_DISCONNECT:ESP_LOGI(TAG, "Disconnected");// 重新广播ble_gap_adv_start(ble_adv_params, NULL);break;case BLE_GAP_EVENT_ADV_COMPLETE:ESP_LOGI(TAG, "Advertising complete");break;default:break;}return 0;}// ── 广播参数 ──static struct ble_gap_adv_params adv_params = {.conn_mode = BLE_GAP_CONN_MODE_UND, // 可连接.disc_mode = BLE_GAP_DISC_MODE_GEN, // 可发现};// ── 主机同步回调 ──static void on_sync(void) {// 设置设备名称ble_svc_gap_device_name_set("NimBLE_ESP32");// 开始广播ble_gap_adv_start(&adv_params, NULL);ESP_LOGI(TAG, "Advertising started");}// ── 主机复位回调 ──static void on_reset(int reason) {ESP_LOGW(TAG, "BLE reset: %d", reason);}void app_main(void) {// 1. 初始化 NimBLE 主机ESP_ERROR_CHECK(nimble_port_init());// 2. 注册服务ble_svc_gap_init();ble_svc_gatt_init();ble_gatts_count_cfg(gatt_svr_svcs);ble_gatts_add_svcs(gatt_svr_svcs);// 3. 注册同步/复位回调ble_hs_cfg.sync_cb = on_sync;ble_hs_cfg.reset_cb = on_reset;// 4. 启动主机nimble_port_freertos_init(gap_event_handler);ESP_LOGI(TAG, "NimBLE initialized");}
12.3 Bluedroid vs NimBLE 选择
|
对比项 |
Bluedroid |
NimBLE |
|---|---|---|
| 内存占用 |
~130KB |
~50KB |
| 经典蓝牙 |
✅ 支持 |
❌ 仅 BLE |
| API 复杂度 |
复杂 |
简单 |
| 社区活跃 |
官方维护 |
Apache 活跃 |
| Arduino 支持 |
使用 Kolban 库 |
可用但少 |
| 推荐场景 |
需要经典蓝牙 |
纯 BLE 项目 |
13. 常见问题与调试
13.1 故障排查树
❌ BLE 问题排查│├─ 手机扫不到设备?│ ├─ BLE 初始化了吗?→ BLEDevice::init()│ ├─ 广播开始了吗?→ startAdvertising()│ ├─ 广播间隔太长?→ 调到 100ms 测试│ └─ 手机蓝牙开了吗?→ 常见低级错误│├─ 能扫到但连接不上?│ ├─ 连接数满了?→ 最多 3 个连接│ ├─ 其他设备占着连接?→ 断开重试│ ├─ 配对认证失败?→ 检查安全设置│ └─ 距离太远?→ BLE 有效距离 ~10m│├─ 能连接但读不到特征?│ ├─ 服务 UUID 匹配吗?→ 大小写/格式│ ├─ 特征属性对吗?→ READ/WRITE 权限│ └─ 服务启动了吗?→ service->start()│├─ 收不到通知?│ ├─ CCCD 订阅了吗?→ 手机要订阅│ ├─ 加了 BLE2902 吗?→ Notify 必须│ └─ 调用了 notify() 吗?→ 记得调用│└─ 数据乱码/丢失?├─ 分包了吗?→ 单包限 20 字节├─ MTU 太小的手机 → 用 20 字节分包└─ 传输太快?→ 加延迟
13.2 调试技巧
// ── 开启详细日志 (Arduino) ──BLEDevice::setVerbose(true); // 打开 BLE 详细日志// 或:// BLEDevice::init("");// BLEDevice::setVerbose(true);// ── 查看 BLE 状态 ──void printBLEStatus() {// 检查 BLE 是否在广播// 打印本地地址BLEAddress addr = BLEDevice::getAddress();Serial.printf("BLE MAC: %s\n", addr.toString().c_str());}// ── ESP-IDF 日志等级 ──// menuconfig → Component config → Bluetooth → Debug log level// 设为 Verbose 可以看到完整的协议栈日志// ── 硬件检查 ──// 1. 板载天线附近不要有金属遮挡// 2. 供电要稳定(BLE 广播瞬间电流 ~40mA)// 3. 远离大功率干扰源
13.3 常见错误与解决
|
错误现象 |
原因 |
解决方案 |
|---|---|---|
GATT error 133 |
特征写失败 |
检查属性权限 |
Connection timeout |
连接超时 |
距离太远/干扰 |
Pin mismatch |
配对失败 |
检查 PIN |
|
服务发现失败 |
外设未启动服务 |
检查 service->start() |
|
内存不足 |
BLE 栈内存占用大 |
用 NimBLE 或增大分区 |
|
广播丢失 |
射频繁忙 |
检查 Wi-Fi 共存 |
14. 总结与对比
14.1 功能对照表
|
操作 |
Arduino (ESP32 BLE) |
ESP-IDF (Bluedroid/NimBLE) |
|---|---|---|
| 初始化 | BLEDevice::init() |
nimble_port_init()
/ |
| 创建服务 | createService() |
ble_gatts_add_svcs() |
| 创建特征 | createCharacteristic() |
ble_gatt_svc_def
定义 |
| 广播 | startAdvertising() |
ble_gap_adv_start() |
| 扫描 | BLEScan::start() |
ble_gap_disc() |
| 连接 | BLEClient::connect() |
ble_gap_connect() |
| 读取特征 | readValue() |
ble_gattc_read() |
| 写入特征 | setValue() |
ble_gattc_write_flat() |
| 通知 | characteristic->notify() |
ble_gatts_chr_updated() |
| 回调 |
类继承回调 |
事件回调函数 |
| 安全 |
BLESecurity |
ble_hs_cfg 配置 |
14.2 Arduino vs ESP-IDF 选择
Arduino (ESP32 BLE Arduino 库):✅ API 面向对象,清晰直观✅ 开发速度快✅ 大量示例可参考✅ 适合快速原型和教学⚠️ 基于 Bluedroid,内存占用大⚠️ 底层控制有限ESP-IDF (NimBLE):✅ 内存占用小 (~50KB)✅ 更灵活的控制✅ 更适合产品级开发✅ Mesh 等高级功能⚠️ API 更底层⚠️ 学习曲线陡⚠️ 代码量更大
14.3 BLE 开发黄金法则
🔧 BLE 开发黄金法则1. ⭐ 先用手机 App 验证nRF Connect 是调试 BLE 最强大的工具。先让它能扫到、能连接,再写代码。2. UUID 要规范标准服务用标准 UUID(0x1800 等)。自定义服务用 128 位 UUID(不要截断)。3. Notify 必须配 BLE2902 (CCCD)没有 CCCD 描述符,手机无法订阅通知。4. 单包数据 ≤ 20 字节默认 MTU 23 字节,减去 3 字节头 = 20 字节数据。发大数据必须分包。5. 断开后记得重新广播外设被断开后,需要手动重新调用 startAdvertising()。6. Wi-Fi + BLE 共存要测试两者共用射频,同时用会有性能损失。7. 广播数据不加密广播是公开的,别把敏感数据放广播里。8. 连接间隔 vs 功耗权衡连接间隔短 = 低延迟但费电。根据应用需求平衡。
14.4 参考资源
|
资源 |
链接 |
|---|---|
|
BLE 协议规范 4.2 |
https://www.bluetooth.com/specifications/specs/ |
|
ESP32 BLE Arduino 库 |
https://github.com/espressif/arduino-esp32/tree/master/libraries/BLE |
|
ESP-IDF BLE 示例 |
https://github.com/espressif/esp-idf/tree/master/examples/bluetooth |
|
NimBLE 官方文档 |
https://mynewt.apache.org/latest/network/docs/ |
|
nRF Connect App |
https://www.nordicsemi.com/Products/Development-tools/nrf-connect-for-mobile |
|
微信小程序蓝牙 API |
https://developers.weixin.qq.com/miniprogram/dev/api/device/bluetooth/ |
🌟 欢迎关注与交流
如果这份教程对你有帮助,欢迎点赞、收藏、转发!
|
📌 |
链接 / 说明 |
|---|---|
|
📖 更多 ESP32 教程 |
本系列持续更新中 |
|
💬 问题反馈 |
欢迎在项目中提 Issue 或 Discussions |
|
⭐ 收藏关注 |
点个 Star / 收藏,第一时间获取更新 |
📚 系列教程(已发布):
|
# |
教程 |
状态 |
|---|---|---|
|
1 |
ESP32 GPIO 编程教程:Arduino 与 ESP-IDF 双环境指南 |
✅ 已完成 |
|
2 |
ESP32 FreeRTOS 编程教程:Arduino 与 ESP-IDF 双环境指南 |
✅ 已完成 |
|
3 |
ESP32——深度睡眠与低功耗 编程教程:Arduino 与 ESP-IDF 双环境指南 |
✅ 已完成 |
|
4 |
ESP32——Wi-Fi 网络编程教程:Arduino 与 ESP-IDF 双环境指南 |
✅ 已完成 |
|
5 |
ESP32——I2C 总线通信 编程教程:Arduino 与 ESP-IDF 双环境指南 |
✅ 已完成 |
|
6 |
ESP32——SPI 总线通信 编程教程:Arduino 与 ESP-IDF 双环境指南 |
✅ 已完成 |
|
7 |
ESP32——ADC / 模拟信号 编程教程:Arduino 与 ESP-IDF 双环境指南 |
✅ 已完成 |
|
8 |
ESP32——UART 串口通信 编程教程:Arduino 与 ESP-IDF 双环境指南 |
✅ 已完成 |
|
9 |
ESP32——蓝牙 BLE 编程教程:Arduino 与 ESP-IDF 双环境指南 |
✅ 最新 |
🔜 更多主题规划中:LVGL 图形界面、摄像头与视觉、NVS 存储……
文档版本:v1.0 | 最后更新:2026-07-27